National Police Clearance Online in the Philippines 2025
In the Philippines, every person needs to secure a police clearance in one way or another. Some of us need it for a new job, visa, or even handling bank transactions. The police clearance certificate (PCC) which is given after police clearance proves you’ve got a clean record, so you can get more opportunities.
How to get police clearance
You can apply online! The Philippine National Police (PNP) made it so much easier with the National Police Clearance Online System (NPCS). Go to their main website, create an account, and book an appointment for your Clearance Application. On the appointment day, go to the police station with your ID and payment proof to receive it!
That being said, we’ll guide you through these steps to apply for a National police clearance in the Philippines online. We’ve included info on the documents you need for the process and different types of police clearance. Let’s start!
7-Step Process for Applying Online for National Police Clearance
Follow these easy steps to apply for a police clearance online:
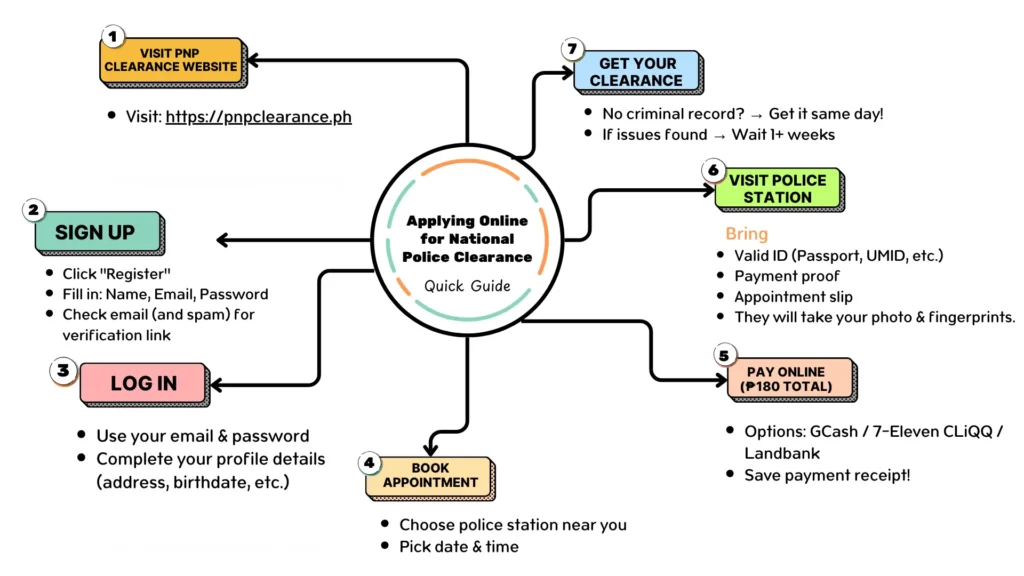
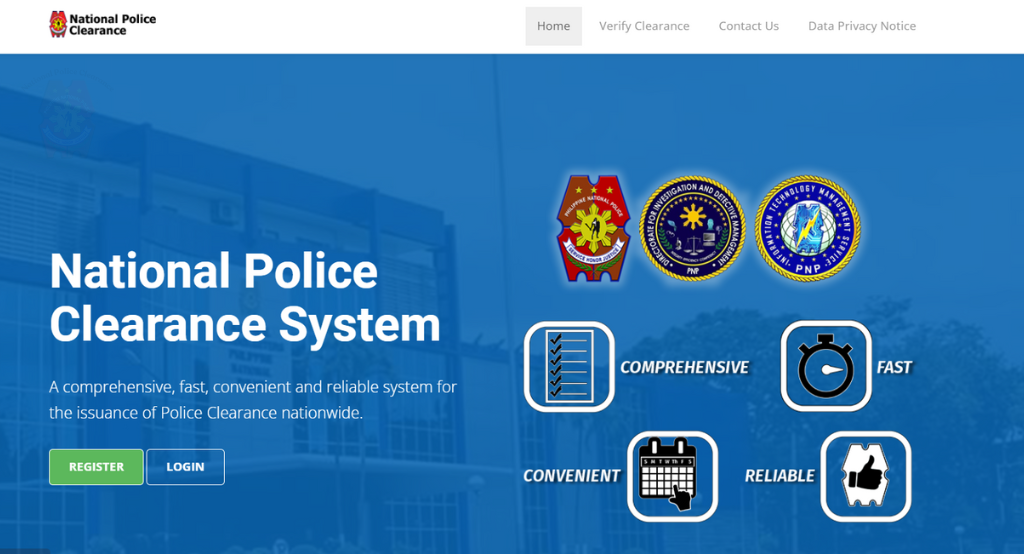
Visit the PNP Website
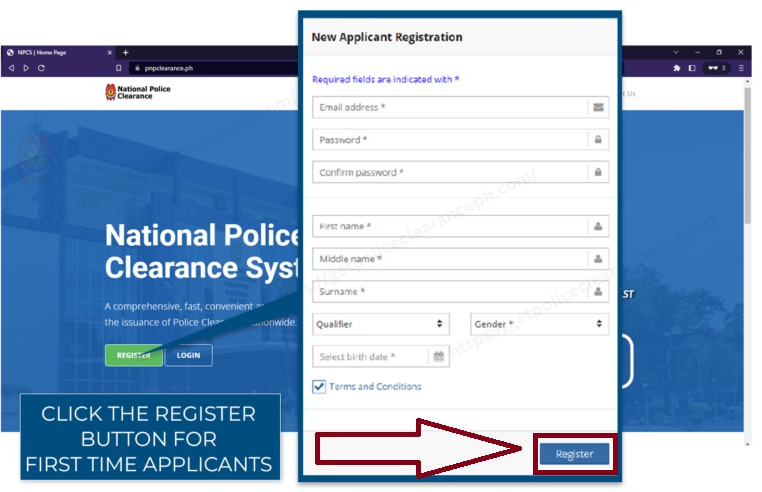
Register for an Account
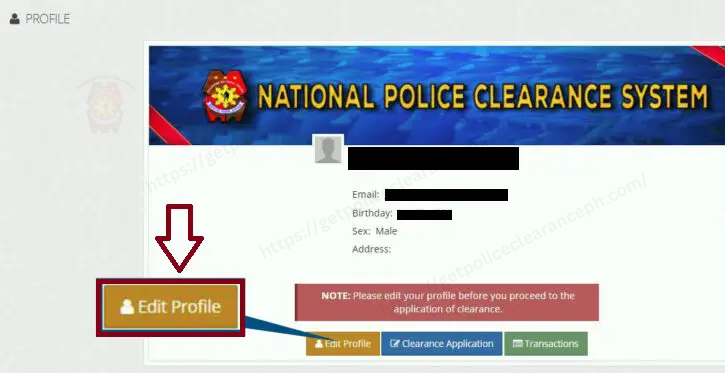
Log In to Your Account
Set an Appointment
Pay the Fee
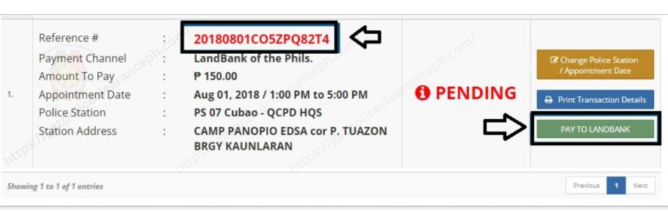
Go to the Police Station for Biometrics
Receive Your Clearance
The police will check if you have any pending cases or criminal records, also known as a “hit.” The police Verification Process will give results as:
That’s all! Follow the above steps to get a police clearance certificate (PCC)!
Important: The online system is only for registration and appointment scheduling. You must still go to the police station to complete the process.
Requirements and Documents for National Police Clearance
To get a National Police Clearance, you would need to meet certain requirements and bring in some documents. Here’s all you need to know:
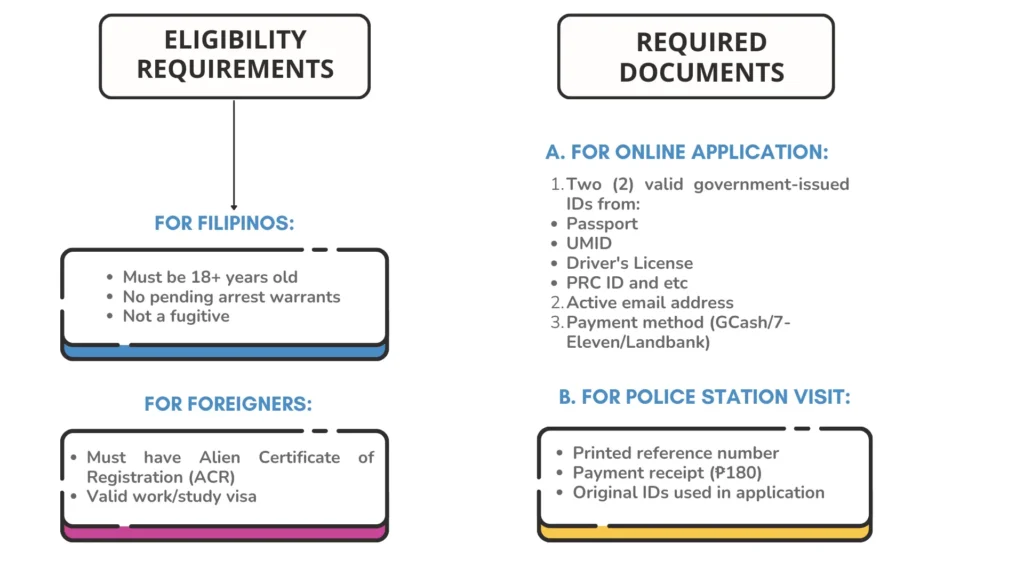
Who Can Apply for a Police Clearance?
Here’s who is qualified for a Police Clearance in the Philippines
Important: Each city or town has its own rules, so it is always better to check with your local police stations and districts.
What Documents Do You Need?
Before starting the online application, have these 4 things ready:
What to Bring to the Police Station
The above documents are just for online application. After applying online, go to the police station on your appointment date. Make sure you bring these 3 documents:
Important: Filipinos who are applying for local police clearance need to bring two more documents with the above ones. Check the types of Police clearance section given below to see how to apply. In this, here’s the additional two docs you’ll need:
Processing Time for National Police Clearance
Here’s how long it takes to get your Police Clearance in the Philippines:
All About National Police Clearance
A National Police Clearance is an official document issued by the Philippine National Police (PNP). It confirms that you don’t have a criminal record or any pending criminal cases in the Philippines. People need it as proof that their background is clean.
In the past, getting a police clearance meant visiting local police stations and getting a date for an appointment. But now, you can just apply online to get an appointment. Then, you can go to the nearest police station to pick up your national police clearance certificate.
Important: A police clearance can’t be used for everything. For example, the Department of Foreign Affairs (DFA) does not allow it to be used for registering to vote with the Commission on Elections (COMELEC).
Additional Information on Phillipines’s Police Clearance Procedures
If you want to learn more about the types of police clearances, how to apply for local police clearance, and the differences between police clearance procedures, read on! Let’s begin with the types of police clearances:
Types of Police Clearance in the Philippines
There are two main types of police clearance in the Philippines, namely National Police Clearance (NPC) and Local Police Clearance (LPC). Here’s what each type means:
National Police Clearance: The National Police Clearance covers almost the same range as that of an NBI Clearance. Meaning it checks if you have a criminal record across the entire country. We have given how to apply for national police clearance online above.
LPC or Local Police Clearance: Compared to NPC, this type is limited. It can only verify criminal records in the municipality or city that you are a resident of. This is often required upon application to jobs within your living area.
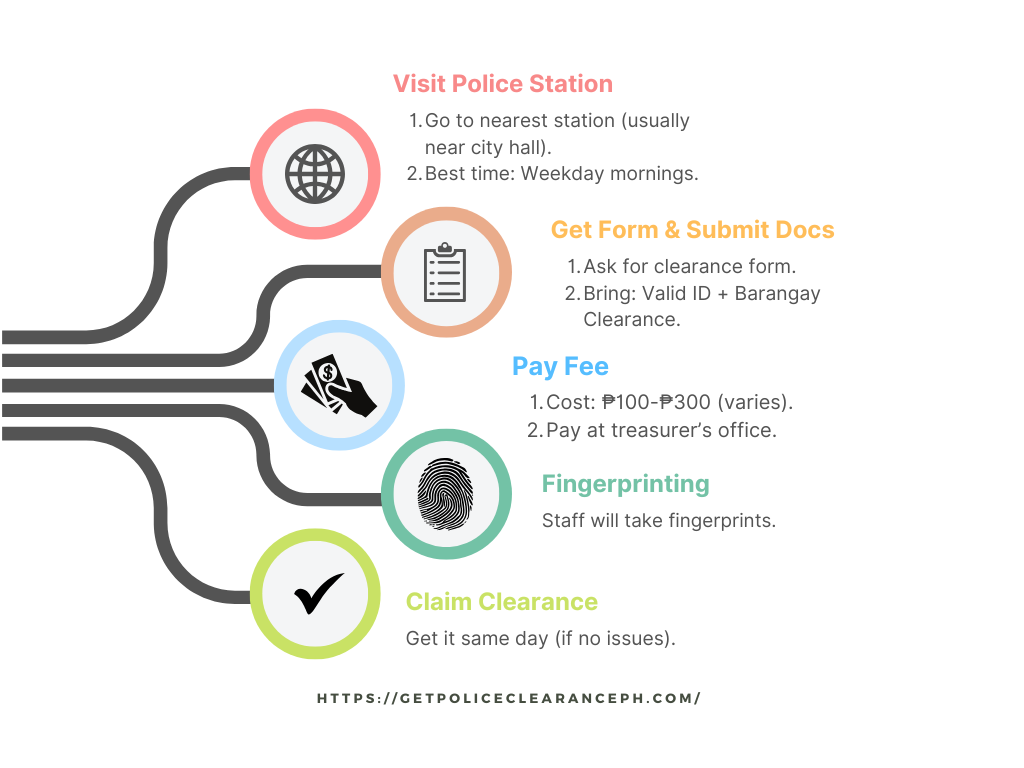
How to Get a Local Police Clearance
Here’s how you can apply for a Local Police Clearance:
Local Police Clearance vs. National Police Clearance
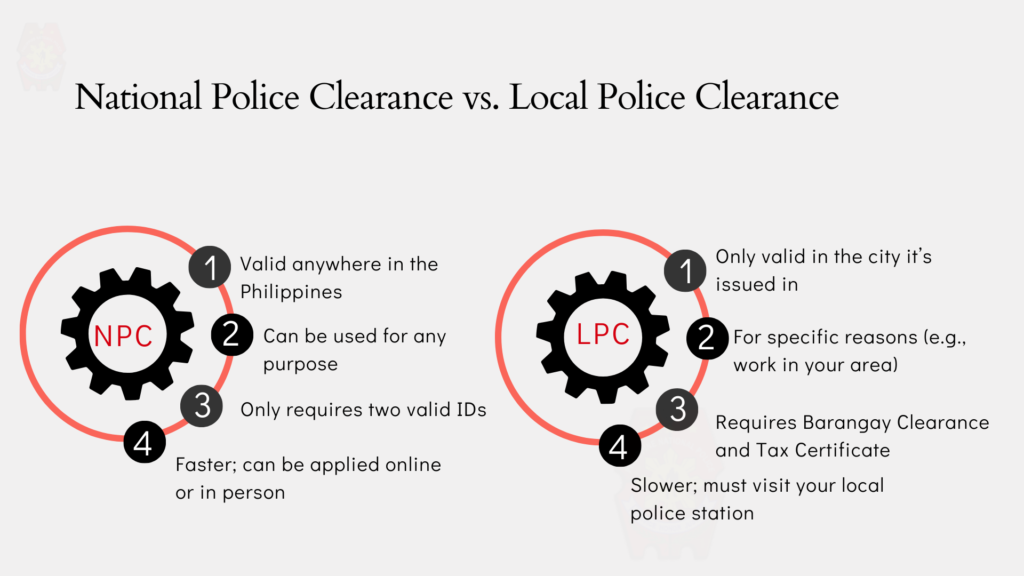
| Features | LPC (Local Police Clearance) | NPC (National Police Clearance) |
|---|---|---|
| Scope | Only valid in the city it’s issued in | Valid anywhere in the Philippines |
| Why Do You Need It? | For a specific reason (like work in your area) | Can be used for any purpose |
| Documents Needed | More documents needed | Only requires two valid IDs |
| Processing Speed | Slow | Fast |
| How to Get It | Must go to your local police station | Can be applied online or in person |
Difference Between National Police Clearance and NBI Clearance
National Police Clearance (NPC) and National Bureau of Investigation (NBI) may seem similar but they are not. Both serve different purposes and are issued by different authorities.
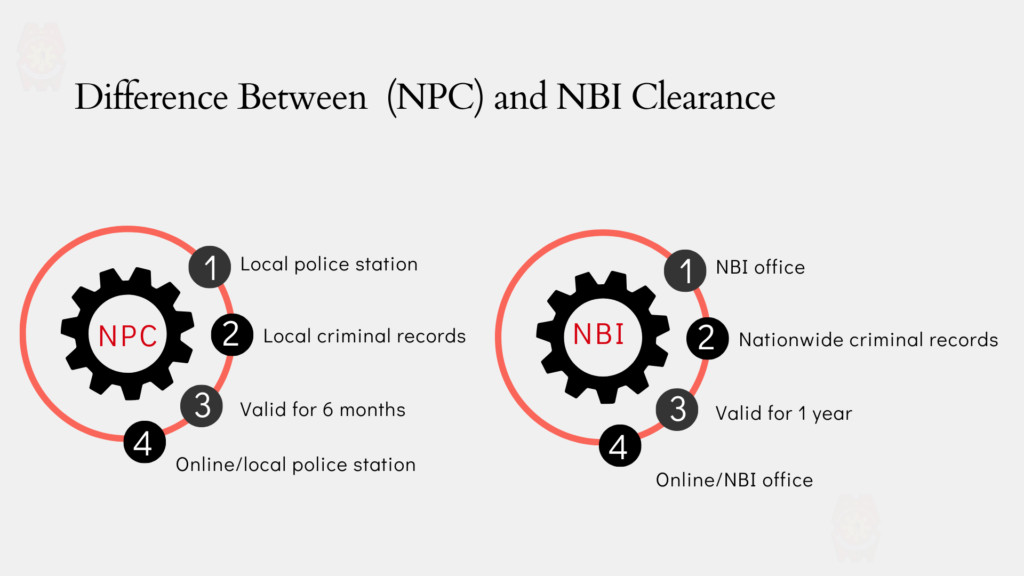
A Police Clearance is provided by the local police department and shows if you have any local criminal records. On the other hand, an NBI Clearance is issued by the National Bureau of Investigation (NBI). It provides a broader check, covering nationwide criminal records. This type of clearance is often required for more sensitive jobs, government transactions, and legal processes. Here’s a table to understand their differences:
| Features | NPC (National Police Clearance) | NBI (National Bureau of Investigation) |
|---|---|---|
| Issued By | Local police station | National Bureau of Investigation (NBI) office |
| Scope | Local criminal records | Nationwide criminal records |
| Validity | Usually 6 months | Usually valid for 1 year, unless stated otherwise |
| How to Apply | Apply online or at the local police station | Apply online or at the NBI office |
Final Words
Summit it up, getting your police clearance online in the Philippines is easy. Just follow the simple steps we’ve shared, and you’ll have your clearance in no time. Our tip is to arrive early at the police station, make sure your IDs are valid, and dress neatly, as some police stations require appropriate attire. And don’t forget to keep your payment receipt until you receive your clearance.
Lastly, remember that your police clearance should be less than six months old when you submit it (to any type of organization) and it must be in English or translated officially.
